How to make a leather bag

Step 1: Tools and Materials
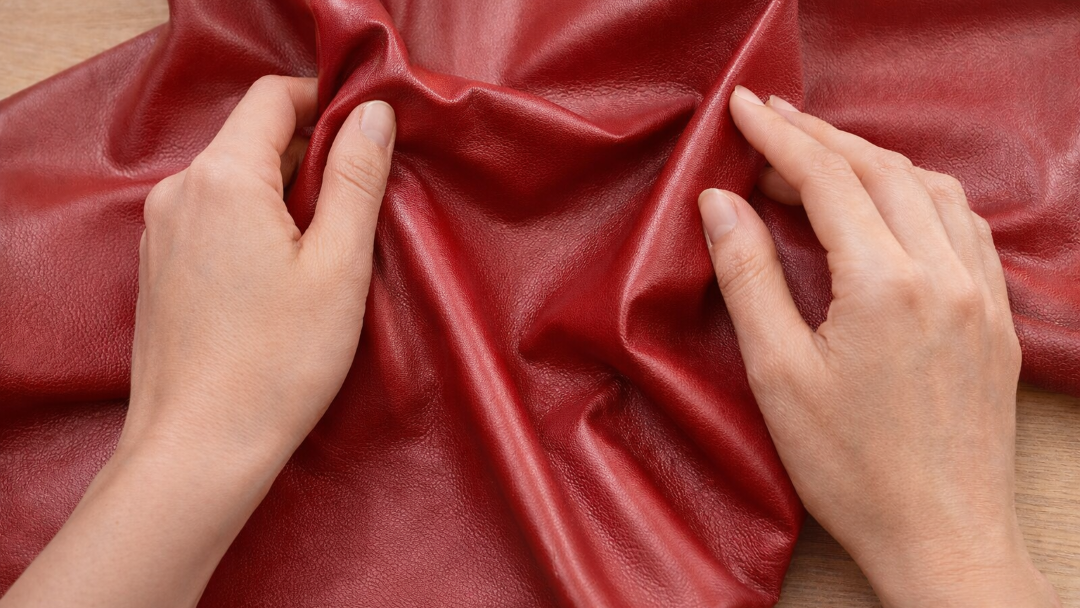
Vegetable-tanned natural leather
Leather knife, leather punches, lace cutter, lacing needle, rivets and snap button, setter for hardware, Mallet and a set of tooling stamps, edge beveller, D-rings
Antique gel, Professional oil dye, Carnauba cream, waterproof balm of any type, Neatsfoot oil, sheep wool, paper towel
Step 2: Patterns
Any home printer will do the job. Then assemble the printed parts and glue them together, connecting the cut marks. Cut the patterns out of paper. You can also find a lot of different tooling patterns on the internet.
Step 3: Cutting the Leather
First, we need to transfer the pattern to leather. Place the patterns on leather. Use a sharp round awl to trace all the lines, including marks for hardware installation and lacing holes. When placing the pattern, try to use as much workable space on leather as possible, so you do not have much waste. This leather is expensive!
Do not press the awl deep into the leather, just make light lines to trace the pattern. After tracing all the lines, use a very sharp knife or leather scissors to cut out the parts.
Step 4: Preparing the Pieces
Now, as all the parts are cut out, you need to punch the holes for hardware and lacing and prepare the leather pieces for the next steps.
For lacing, holes, use a punch with a diameter as big as your lace is wide. If the holes are bigger, the lace will be loose and your bag will be flimsy and will fall apart very quickly. You want the lace to sit tight in the holes; in this case, the construction will be very sturdy and last forever. The punch itself should be sharp. If it keeps being stuck in leather – use a piece of beeswax. First, punch the wax and then – leather.
Use a strap end punch or just scissors to shape the ends of gussets if you want to.
Bevel all the edges, so they look smooth and nice. Use the smallest beveller you have. Go around the edges on all parts. Use a special curved edger with a hole for tough corners.
Step 5: Make Lace
Use the same leather to make lace as for the bag itself.
Take a medium-sized leather piece and make a 1″ hole in the center. Do not worry if it is not perfect, it does not matter. Start cutting along the edge a couple of millimeters wide. Make a cut half an inch long. This is just so it is easier to start with the lace cutter. Get the cut piece through the cutter (use the widest hole) and start pulling the end of the leather lace carefully. Start cutting slowly, make sure the leather is caught in the blade and goes through it smoothly (it will go smoothly if the blade is sharp). Pull the end of the lace coming from the cutter while holding the cutter steady. Leather will be turning around the cutter freely, letting you pull the lace. You can cut approximately 8-9 m of lace out of a 20 cm diameter piece of leather.
If you think the lace is not straight enough or too twisted, wet it in the water and wrap it around a bottle. Let it fully dry, and you have your straightened lace.
Step 6: Cutting the Tooling Pattern
Attach a few strips of wide Scotch tape on the backside of leather to prevent stretching and distortion while tooling.
And now it is time for carving or tooling, whatever you call it.
We need to case the leather (to get it wet) in order to do this.
Dip the piece of leather you are going to carve in water, hold it there for a few seconds and remove. If you are using lightweight leather (1-2 mm) then hold it under the water for just a couple of seconds. Lay the wet leather down the surface (workbench or table) and leave it for 40-60min depending on leather thickness and room temperature, so water can penetrate and spread in the leather evenly. When the leather starts bringing the original color back (getting dry on the surface) and is cold to touch, it is ready for carving.
First, we need to transfer the design. Place the paper or film with your picture on cased leather and fix it with weight or just tape it with paper tape (be careful with tapes as they leave glue on leather and dye won’t stay there).
Use a stylus to trace the lines carefully. Do not apply too much pressure, just enough to leave a mark on the leather.
Now we need a swivel knife to cut the lines. There is a huge assortment of swivel knives in all sizes and types. You will just have to pick one, which sits comfortably in your hand. And just as well, there are lots of different sizes and types of blades for these knives. I am using a ceramic blade here, a thick one. The blade must be very sharp.
Time to Cut
Now carefully cut the leather following the lines. Hold the knife straight, do not tilt it left or right. Lift the “leading” corner up above the leather surface, so it is easier to cut. Do not cut deep, no more than half of the leather thickness, otherwise leather won’t be strong and lasting in that area.
If you are not confident with using a swivel knife – practice on scrap leather first. Especially, tiny curves – they are the most difficult to master. Once you are confident – go to the bigger project.
Look at the photos and notice as each line fades away at the start and in the end. Apply less pressure and cut shallower in the beginning and at the end of the line to achieve this look. This will give your swivel knife work a more pleasant and smooth shape. Avoid cutting through the crossing lines as this will make the carving messy.
Step 7: Tooling. Part 1
You will also need a mallet. Buy one which is not too heavy for you to work with for a long time. You will also need a basic set of stamps for tooling leather. You can find them on the Internet or leather supply shops. We will start with a beveller – a stamp, which pushes leather down on one side of a cut while another side stays raised up. This will give your picture an illusion of volume or a 3D look. You will need a smaller size for tiny places and larger ones for straight lines.
To use a beveller you place it in the line cut and hit slightly with the mallet. Hit as deep as your cut is. Then move the beveller slightly along the line and hit again. And then move and hit again. Carry on along all lines. Try to make it smooth, so the prints do not look choppy. Go around all lines. Remember, that you are beveling only one side of the cut line, and the other one stays straight up. You can bevel outside the lines or inside the picture. If you bevel inside, it is called “inverted” tooling. It has a bit of a different look as if the image was pushed in the leather. I am beveling outside the lines.
There will be a frame of some kind here, and I would like to emphasize it a little. I will do it with this background stamp (see the photos). Then stamp the flower center.
Step 8: Tooling. Part 2
Next, we will be lifting flower petals and leaves with a stamp called “lifter” or “undercut”. Place it under the concave parts of the edges of the petals and hit with the mallet. This will make “waves” on the petals and leaves.
Step 9: Tooling. Part 3
Next we will be using a “thumbprint” to add some definition to these petals and leaves. Place it on its heel, lifting the other end up above the surface (see the photos). Hit it with the mallet quite deep to get a nice burnished print. Don’t forget the leaves.
The Center shader will add some texture to the flower center.
Use the veiner on leaves to add more details.
Step 10: Tooling. Part 4
Use a camouflage tool to add texture to the stems and a mule foot for “finishing touch”
Step 11: Tooling. Part 5
6 More Images
Filling background using “bar grounder”.
This is a little tricky stamp, and you would need some practice. If you stamp over the line, otherwise it will give messy look. Fill up the background nicely, little by little.
Now all we have left is a few swivel knife decorative cuts
Do not make many of them, just to add a little touch
Now you can take off the tape, as we do not need it anymore.
Step 12: Oil the Leather
The carving process makes leather lose oils, and we want to restore them. Use Neatsfoot oil or any other leather oil you have or can buy to treat your bag. Give it a thin layer of oil and let it dry completely.
Step 13: Coloring the Background
I you cased the leather right and if the leather is of a good quality your carving should give you nice burnishing color in stamp printed areas. But this is not always the case, so we are going to cheat slightly. Well, this is not really cheating but an actual technique used by leathercrafters. We are going to paint the background in dark color to add the desired contrast.
I am using dark brown oil dye. It dries fast and this is what I want.
We will need a soft, thin detail brush.
Dip the brush into the paint and touch the leather in the middle of the area you are going to dye. Do not start near the edges of flower elements, as the dye will penetrate leather and mark your flower. Start in the center and then move to the edges, adding more paint as needed. Make sure you do not miss even very small background areas.
Let it dry completely and then repeat the process but instead of dye use any finish. This will seal the background and let you dye the whole piece without smudging the paints. When using the finish, be careful not to drop it anywhere but the background, otherwise the antique won’t penetrate there, and you will get light uncolored spots on your bag.
A small tip. If at this stage you apply the finish to the whole tooled design (flowers, leaves, and stems), a few coats letting each of them dry for a couple of hours, then it will give you a good color resistance, and after you apply antique the tooled elements will stay light colored which adds more contrast to your project.
Now let it completely dry for at least a couple of hours
Step 14: Applying Antique and Finish
Now you will need antique paste or gel. Use any color you like, my favorite is saddle tan. You will also need a pair of gloves, some clean water in a cup, a piece of sheep wool or sponge, and a paper towel.
Pour some paint on the piece of wool and start rubbing it in the leather gently in circles. Start with a carved area and make sure you did not miss any cuts, get under the petals and leaves, too. Add more paint on wool and carry on in circular movements to cover the entire piece of leather.
Without any delay, take a piece of paper towel and wipe off excesses of the antique. If it is already dry, wet the towel just slightly and wipe the dry paint off. Do not try to remove all antiques from the cuts and grooves, only from the surface. If you are planning to dye the flesh side, do it with diluted paint. I usually just dip the piece of wool I just used with excesses of paint on it into the water and then smudge it on the flesh side.
Dye all parts of the bag in the same way, and don’t forget about the shoulder strap and the lace!
Leave it to dry a few hours or better overnight. Then take a piece of wool or linen and polish all parts really well, removing all the excesses of paint.
I am going to use carnauba cream as a finish. Carnauba cream usually takes off some dye no matter what, so do not be alarmed when it happens. You can use just an ordinary finish, but basically, any finish will take some dye off anyway.
Half Way THere
I put some carnauba cream on a sponge and rubbed it gently in circles into the leather. It dries quite fast, and then I polish the leather with a piece of wool to give it a nice shine. Note that after carnauba dries out, there is no more paint on the sponge. It does not come off anymore.
Carnauba cream does not waterproof much and I want my bag to have such property, so I will treat it with waterproofing balm. You can buy one of these in the shoe shop or search the Internet for it. There are lots and lots of such products around. I use a sponge for application. When using balm try to use one without much wax in it otherwise wax will be stuck in the cuts in the carved areas. If such a thing happens, just let it dry and then use a new and clean toothbrush to brush the wax off.
Let the balm absorb into the leather and dry completely. Do not forget to treat all parts of the bag, including the lace.
When it is dry, polish everything again. Notice the nice shine after polishing.
Step 15: Installing the Hardware
6 More Images
Now everything is in color and shiny, and we can attach hardware. Install the snap buttons and attach strap D-rings, using rivets.
Step 16: Lacing. Part 1
Now it is time to assemble all the parts.
For lacing, you will need a special needle. It is called Jumbo Perma Loc Needle. You actually have to “screw” the lace into this needle. Before you start lacing, you need to do one trick. Fold inside the front and back panels to make it easier to lace. Just a little so the leather keeps the shape.
Start lacing from the third hole. The gusset will be on top of the panel. Push the needle into the third hole from the grain side of the panel. Pull the lace until you get an inch left.
Push the needle from beneath up to the top through both layers of leather – the panel and the gusset. Now push it through the first hole down.
Pull the needle from beneath to the top through the second hole again and then push it into the third hole. Pull it through the fourth hole from beneath to the top.
Push it down into the fifth hole. Carry on in this manner until you get to the center of the gusset on the bottom of the bag.
Step 17: Lacing. Part 2
When you get there you need to connect the second part of the gusset. Push the needle down through the second part of the gusset and the panel you are lacing. Now pull it through both parts of the gusset to the top.
Lace the gusset and then connect the second panel. Pull the needle from beneath through the second panel and the gusset. Carry on lacing in the same direction.
When you get to the end and your needle will end up on the grain side, push it down through the second hole. Push the needle through between the layers. Pull the lace tight and cut the excess.
Step 18: Lacing. Part 3
Now we repeat the process to lace two other sides. As before, start with the third hole on a panel. Then go through the second hole from underneath to the top through the two layers – the panel and the gusset. Now push the needle down through the first hole. Then go back to the top through the second hole again, and carry on lacing until you get to the middle of the bottom where the gusset parts are connected. Push the needle down through the last available hole.
Now go between the layers.
Then back inside at the other end.
Place the lace between the layers nicely, so it is not much visible. Carry on lacing through the remaining holes.
When you get to the edge and your needle ends up on the top, push it through the second hole inside the bag. Now push the needle between the layers. Pull the lace tight and cut it off.
I tried to explain as detailed as possible. See the photos, each step is shown clearly. If you still have questions, please ask.
Step 19: Attaching the Strap
Now we need to attach the strap. Punch the holes for rivets using a small diameter punch and attach the strap to the D-ring using a rivet.